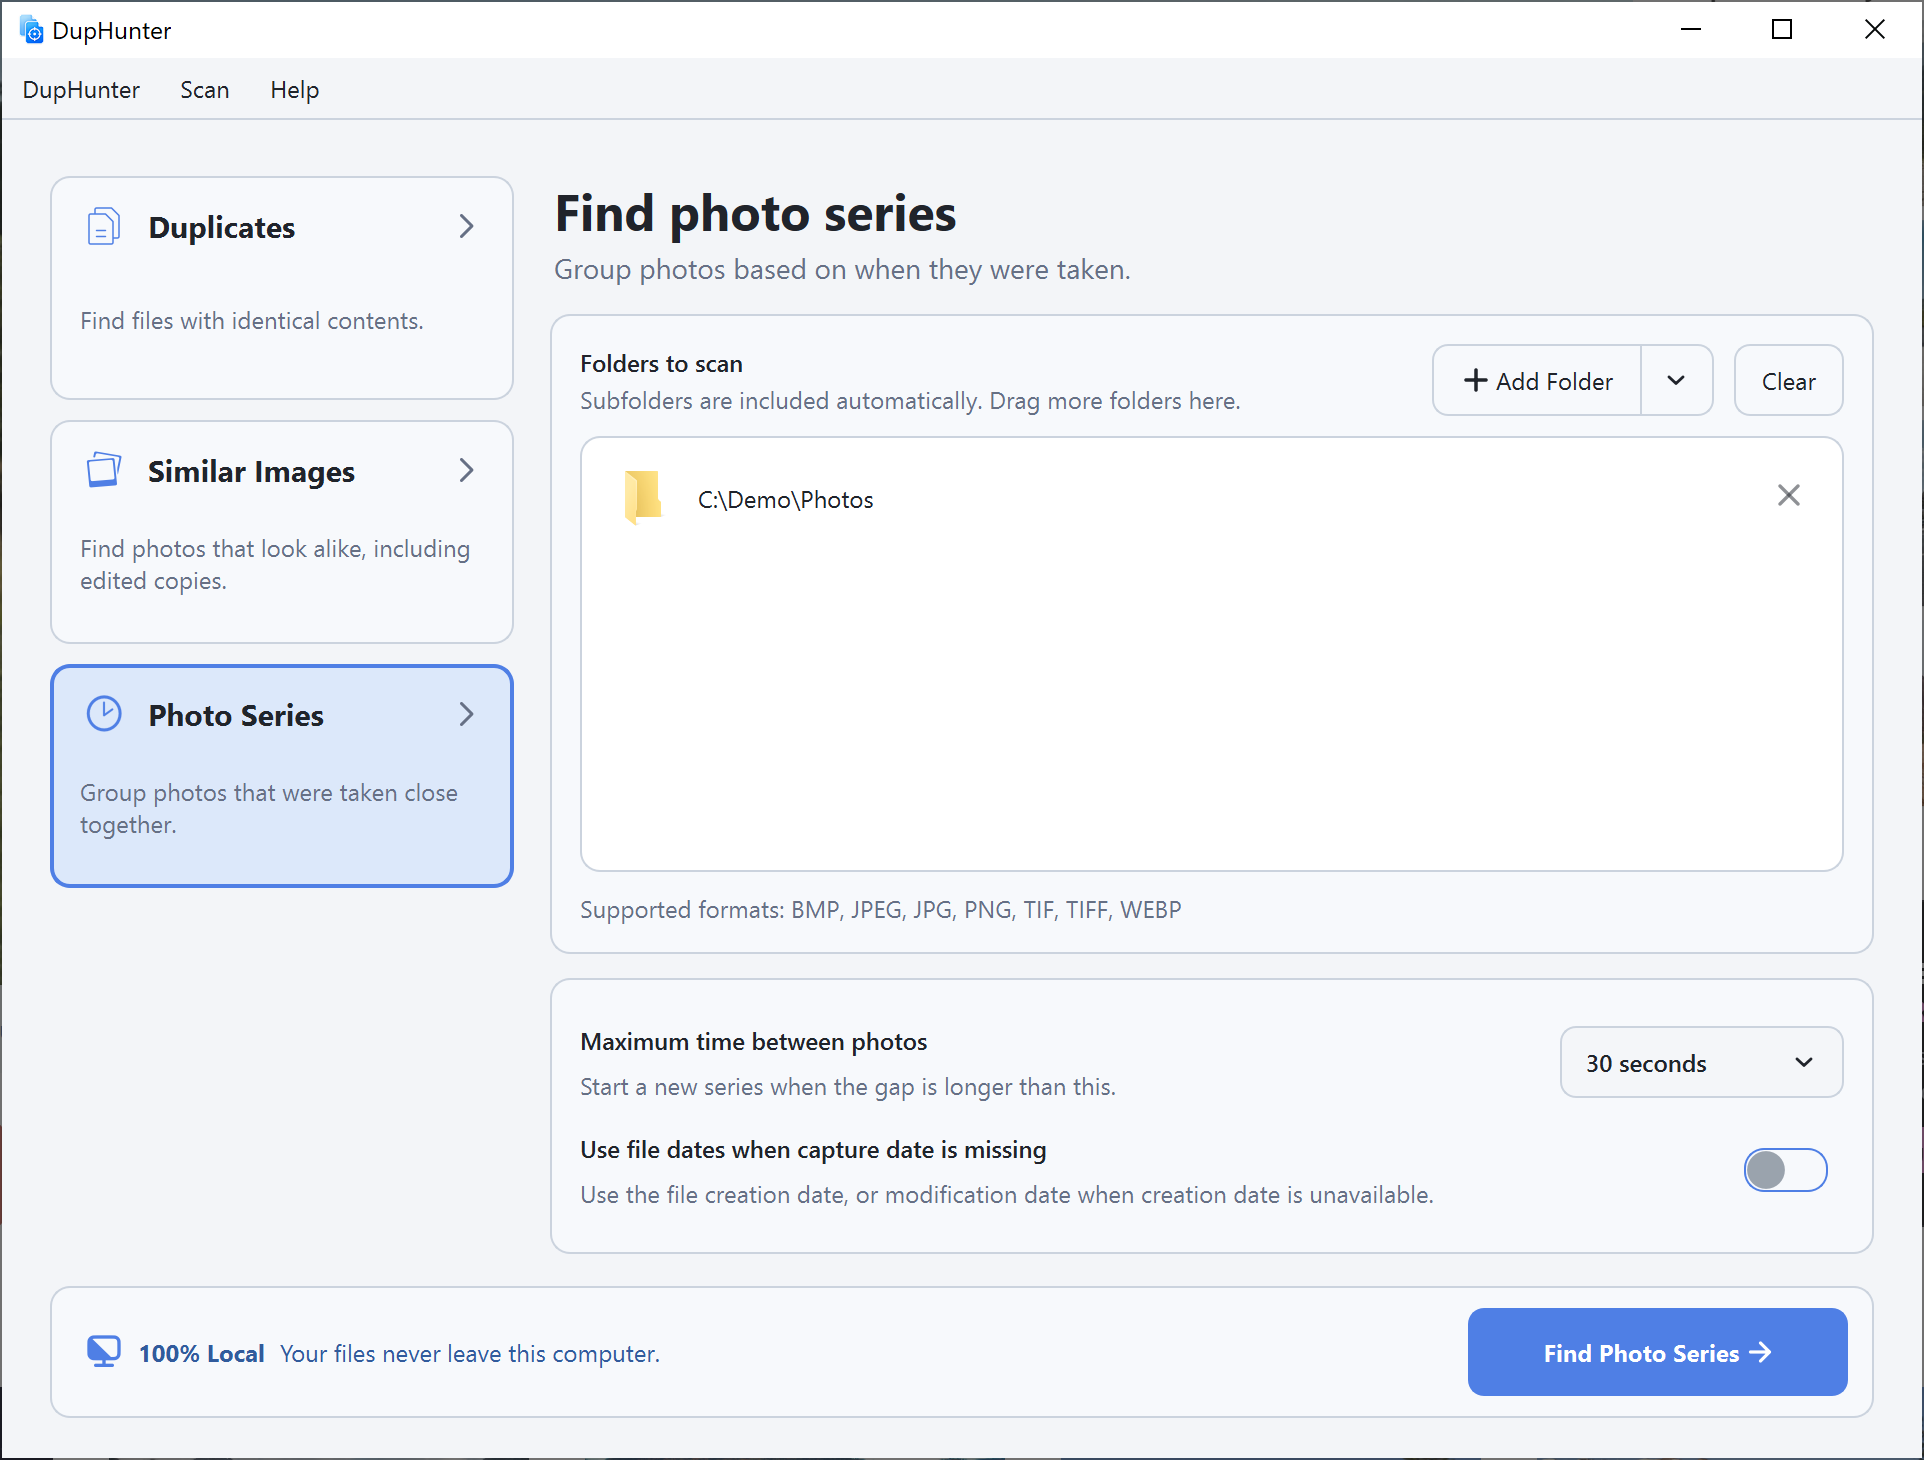
Photo Series mode groups images that were captured close together. It is useful for camera bursts, repeated portraits, bracketed exposures, alternative angles, and sequences from the same event.
Step 1: Select Photo Series
Add the folders that contain your photos. DupHunter reads capture time from available photo metadata and keeps all analysis on your computer.
Step 2: Set the maximum time gap
Choose 1, 5, 10, or 30 seconds for bursts and short sequences. Use 1, 5, or 10 minutes when related shots were taken more slowly. A new series starts when the gap between consecutive photos is longer than the selected value.
If some images have no capture date, enable Use file dates when capture date is missing. DupHunter then uses the file creation date, or the modification date when creation date is unavailable.
Step 3: Browse one series at a time
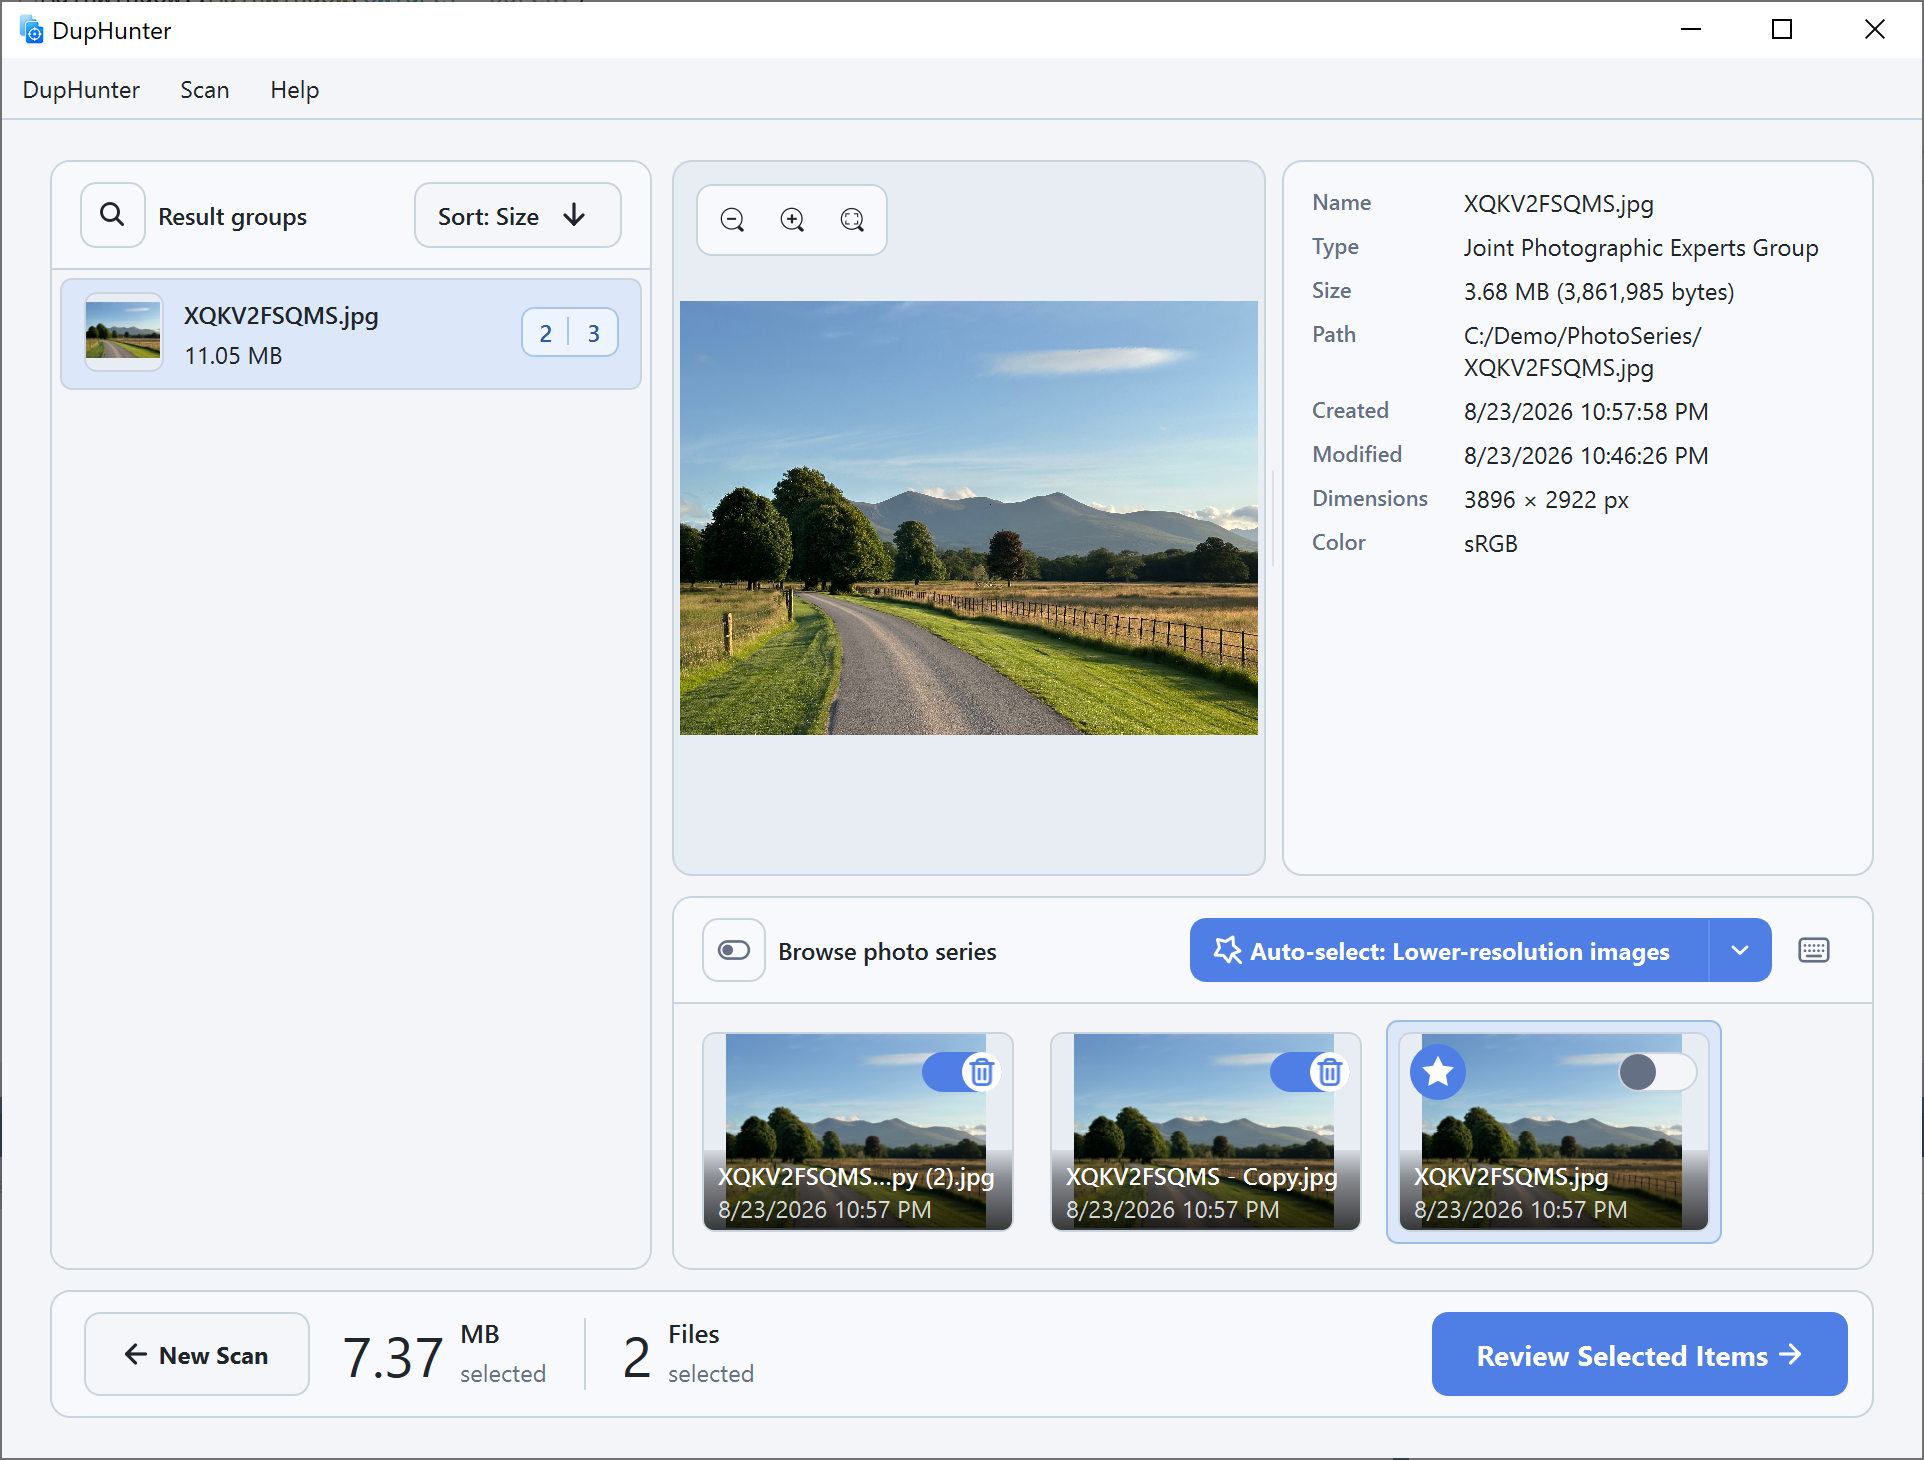
Select a group in the left column. Use the filmstrip to move through the complete series, open each photo in the large preview, and inspect capture time, camera information, dimensions, and other available metadata.
Step 4: Keep the best shots
Mark unwanted frames manually or use Keep only this photo when one image is clearly the best. A rule such as Lower-resolution images can help with mixed exports, but sharpness, expression, and composition still deserve a visual check.
Step 5: Review before removal
Click Review Selected Items and scan the final list once more. Uncheck any uncertain photo, then choose Remove Selected Items. Confirmed images are sent to the Trash or Recycle Bin and recorded in Removal History when history is enabled.