Similar Images mode looks at visual content rather than requiring byte-for-byte equality. It is designed for resized exports, recompressed downloads, crops, color edits, and other versions that still depict the same scene.
Step 1: Add the photo locations
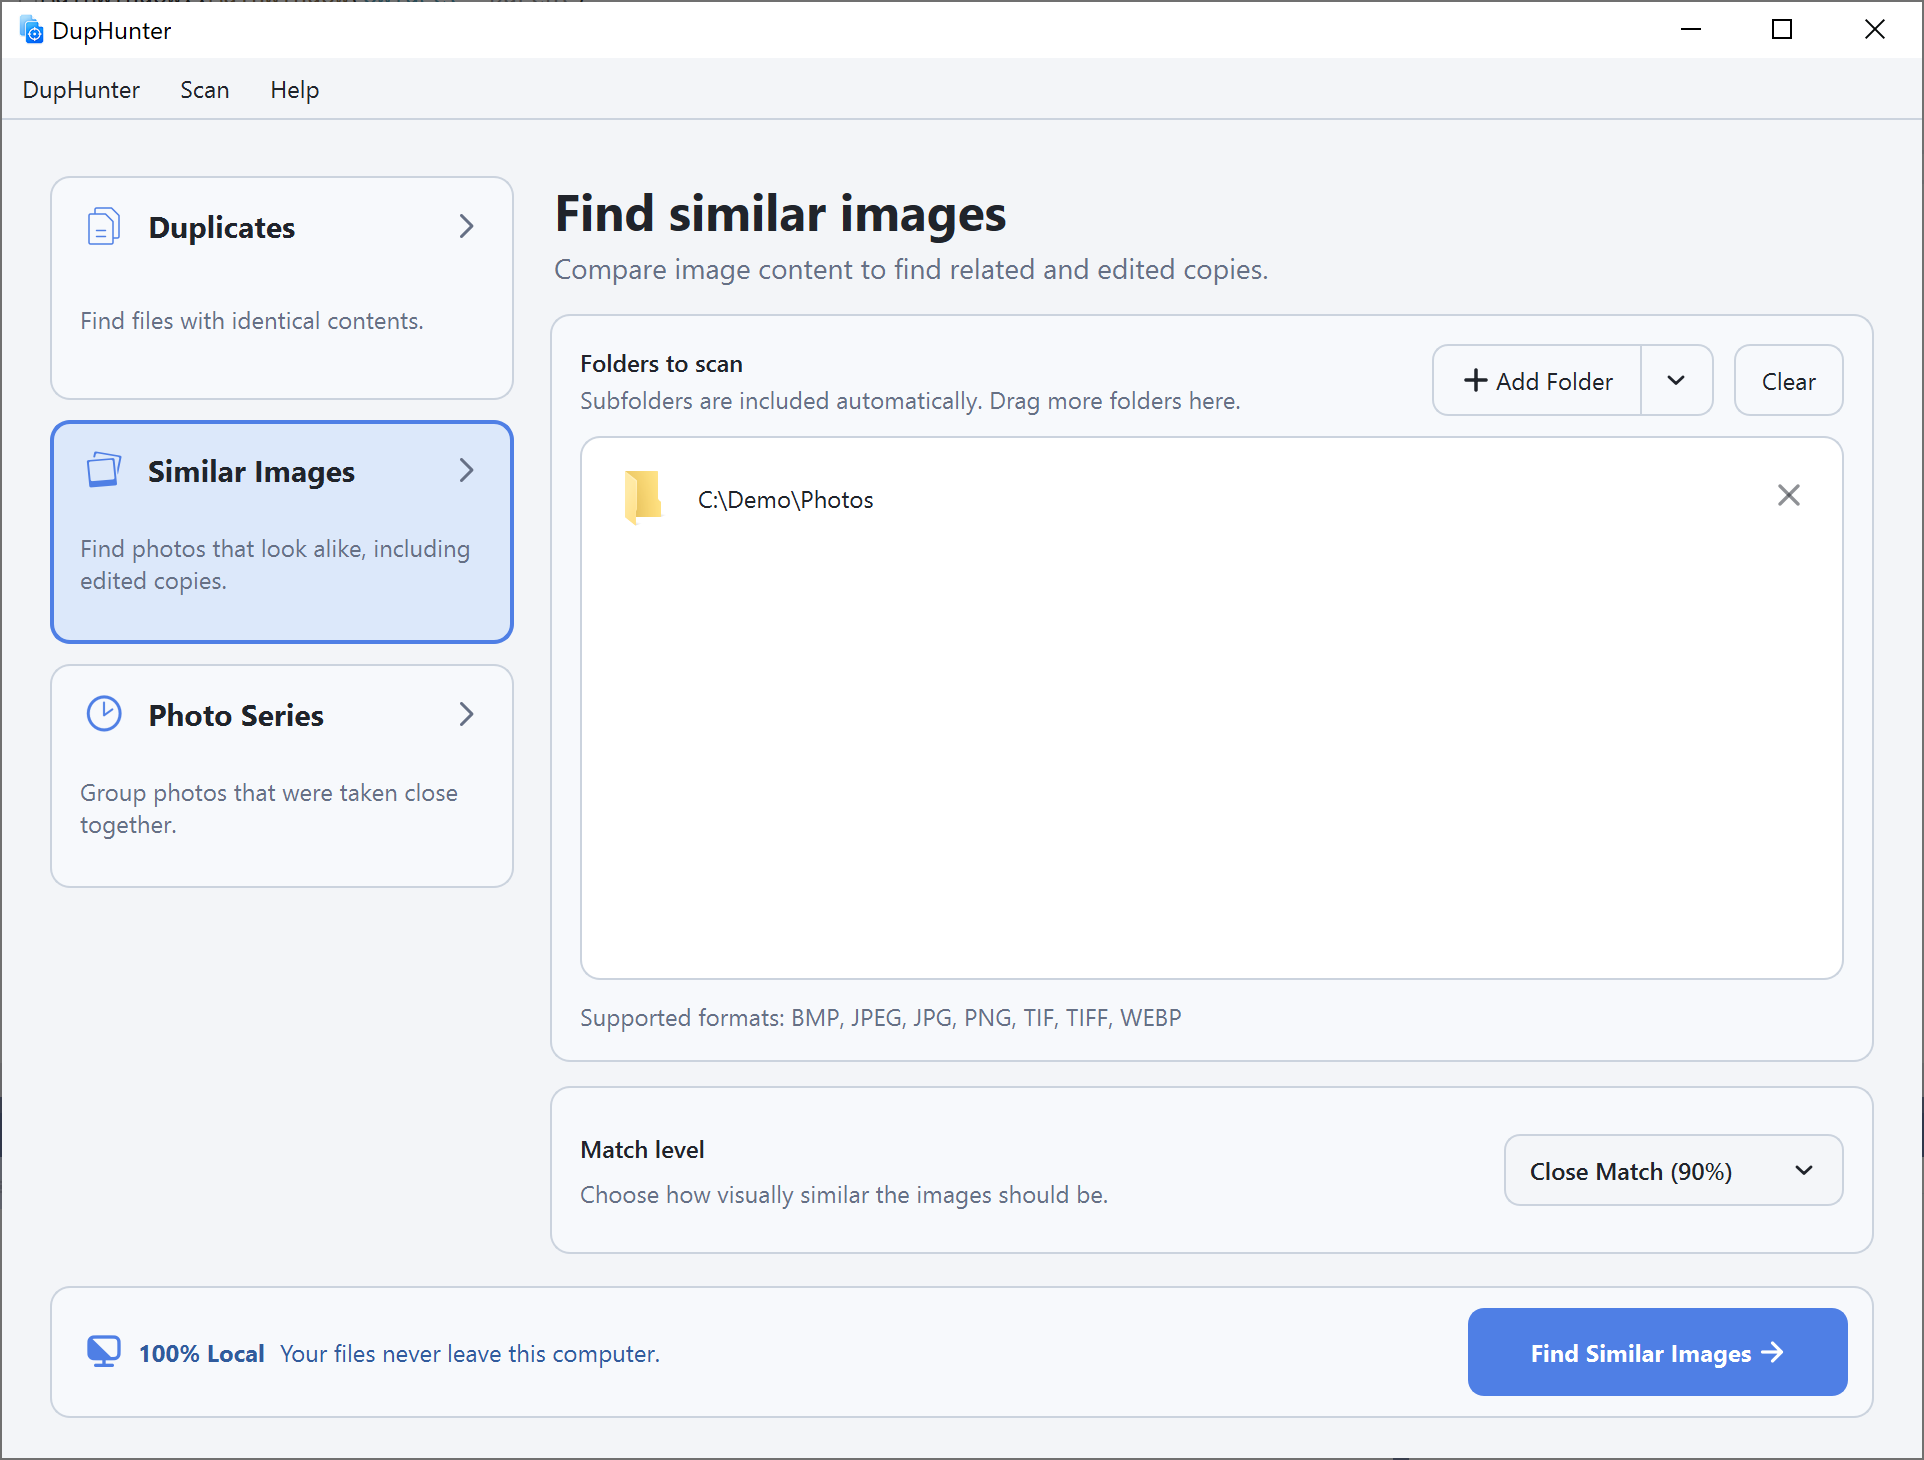
Select Similar Images, then add one or more folders. Subfolders are included. The supported formats are JPG, JPEG, PNG, TIFF, TIF, BMP, and WebP; HEIC and HEIF are also available on macOS.
Step 2: Choose a match level
- Related (80%) casts the widest net.
- Similar (85%) and Close Match (90%) work well for a first cleanup.
- Very Close (94%) and Near-Duplicate (97%) focus on conservative, nearly identical matches.
Start at 90% if you are unsure. Lower the threshold when valid edits are being missed; raise it when groups contain photos that are too different.
Step 3: Compare each group
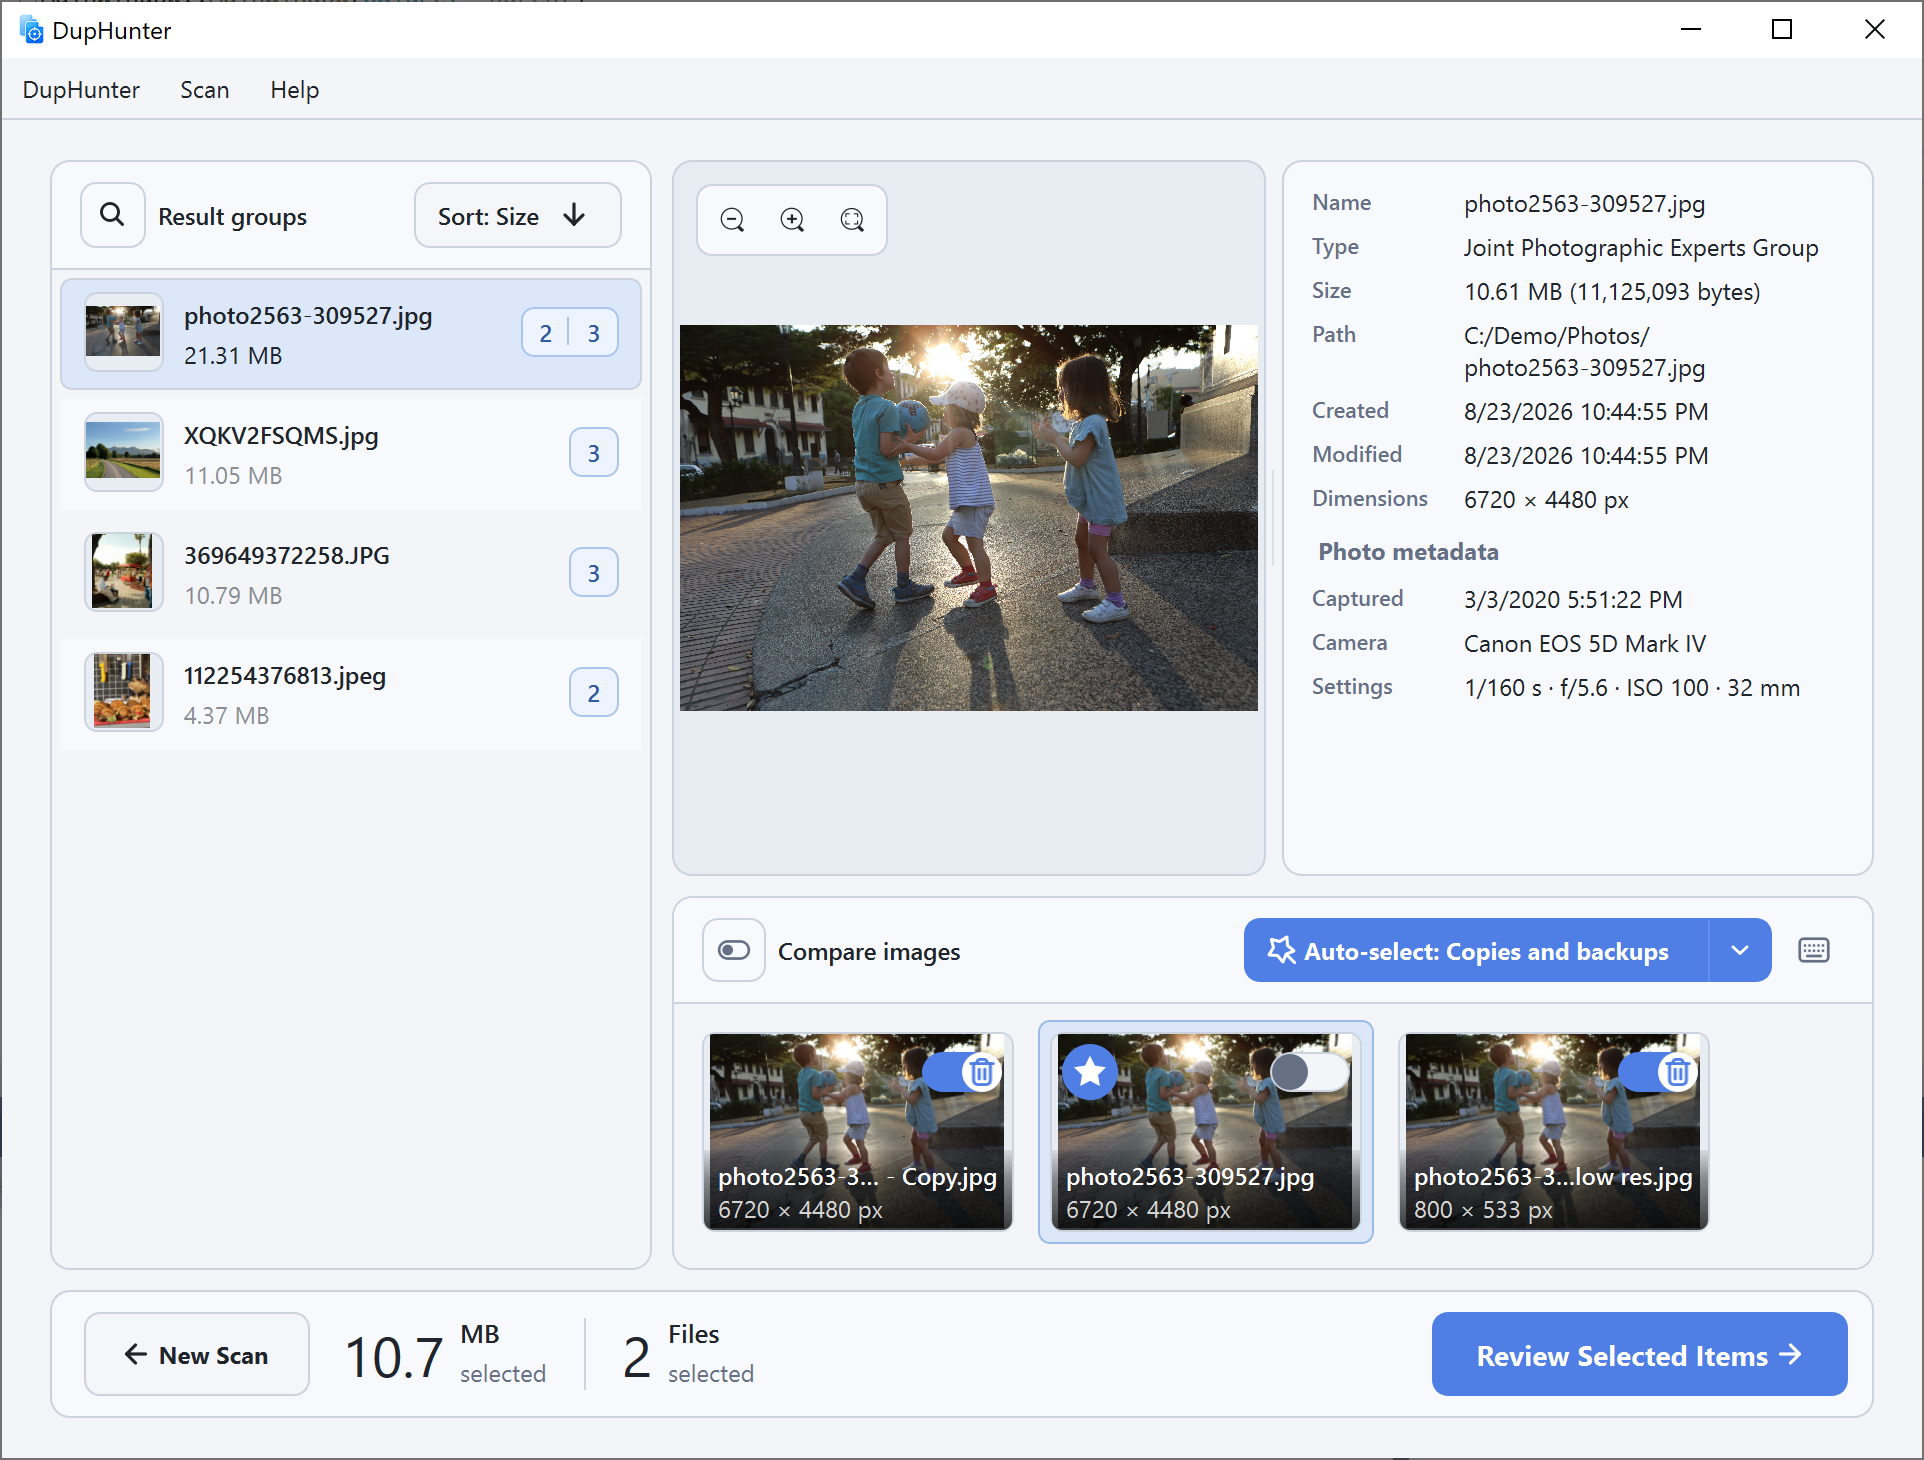
Select a group to open the large preview. Switch between images in the filmstrip and compare dimensions, file size, dates, path, and available photo metadata. Use the zoom controls when compression artifacts or focus differences are hard to see.
Step 4: Mark the versions to remove
Choose manually, use Keep only this photo, or apply a rule such as Lower-resolution images. Automatic rules add to your current selections, so inspect every group before continuing.
Step 5: Confirm the final list
Click Review Selected Items, uncheck anything you want to keep, and then choose Remove Selected Items. Confirmed files are sent to the operating system's Trash or Recycle Bin. Visual analysis and previews are created locally; the photos are not uploaded.