DupHunter's Duplicates mode searches for files with identical contents. You can scan all readable files, a category such as Images or Documents, or only the extensions you specify. Complete duplicate folder trees can also be compared when All Files is selected.
Step 1: Choose Duplicates
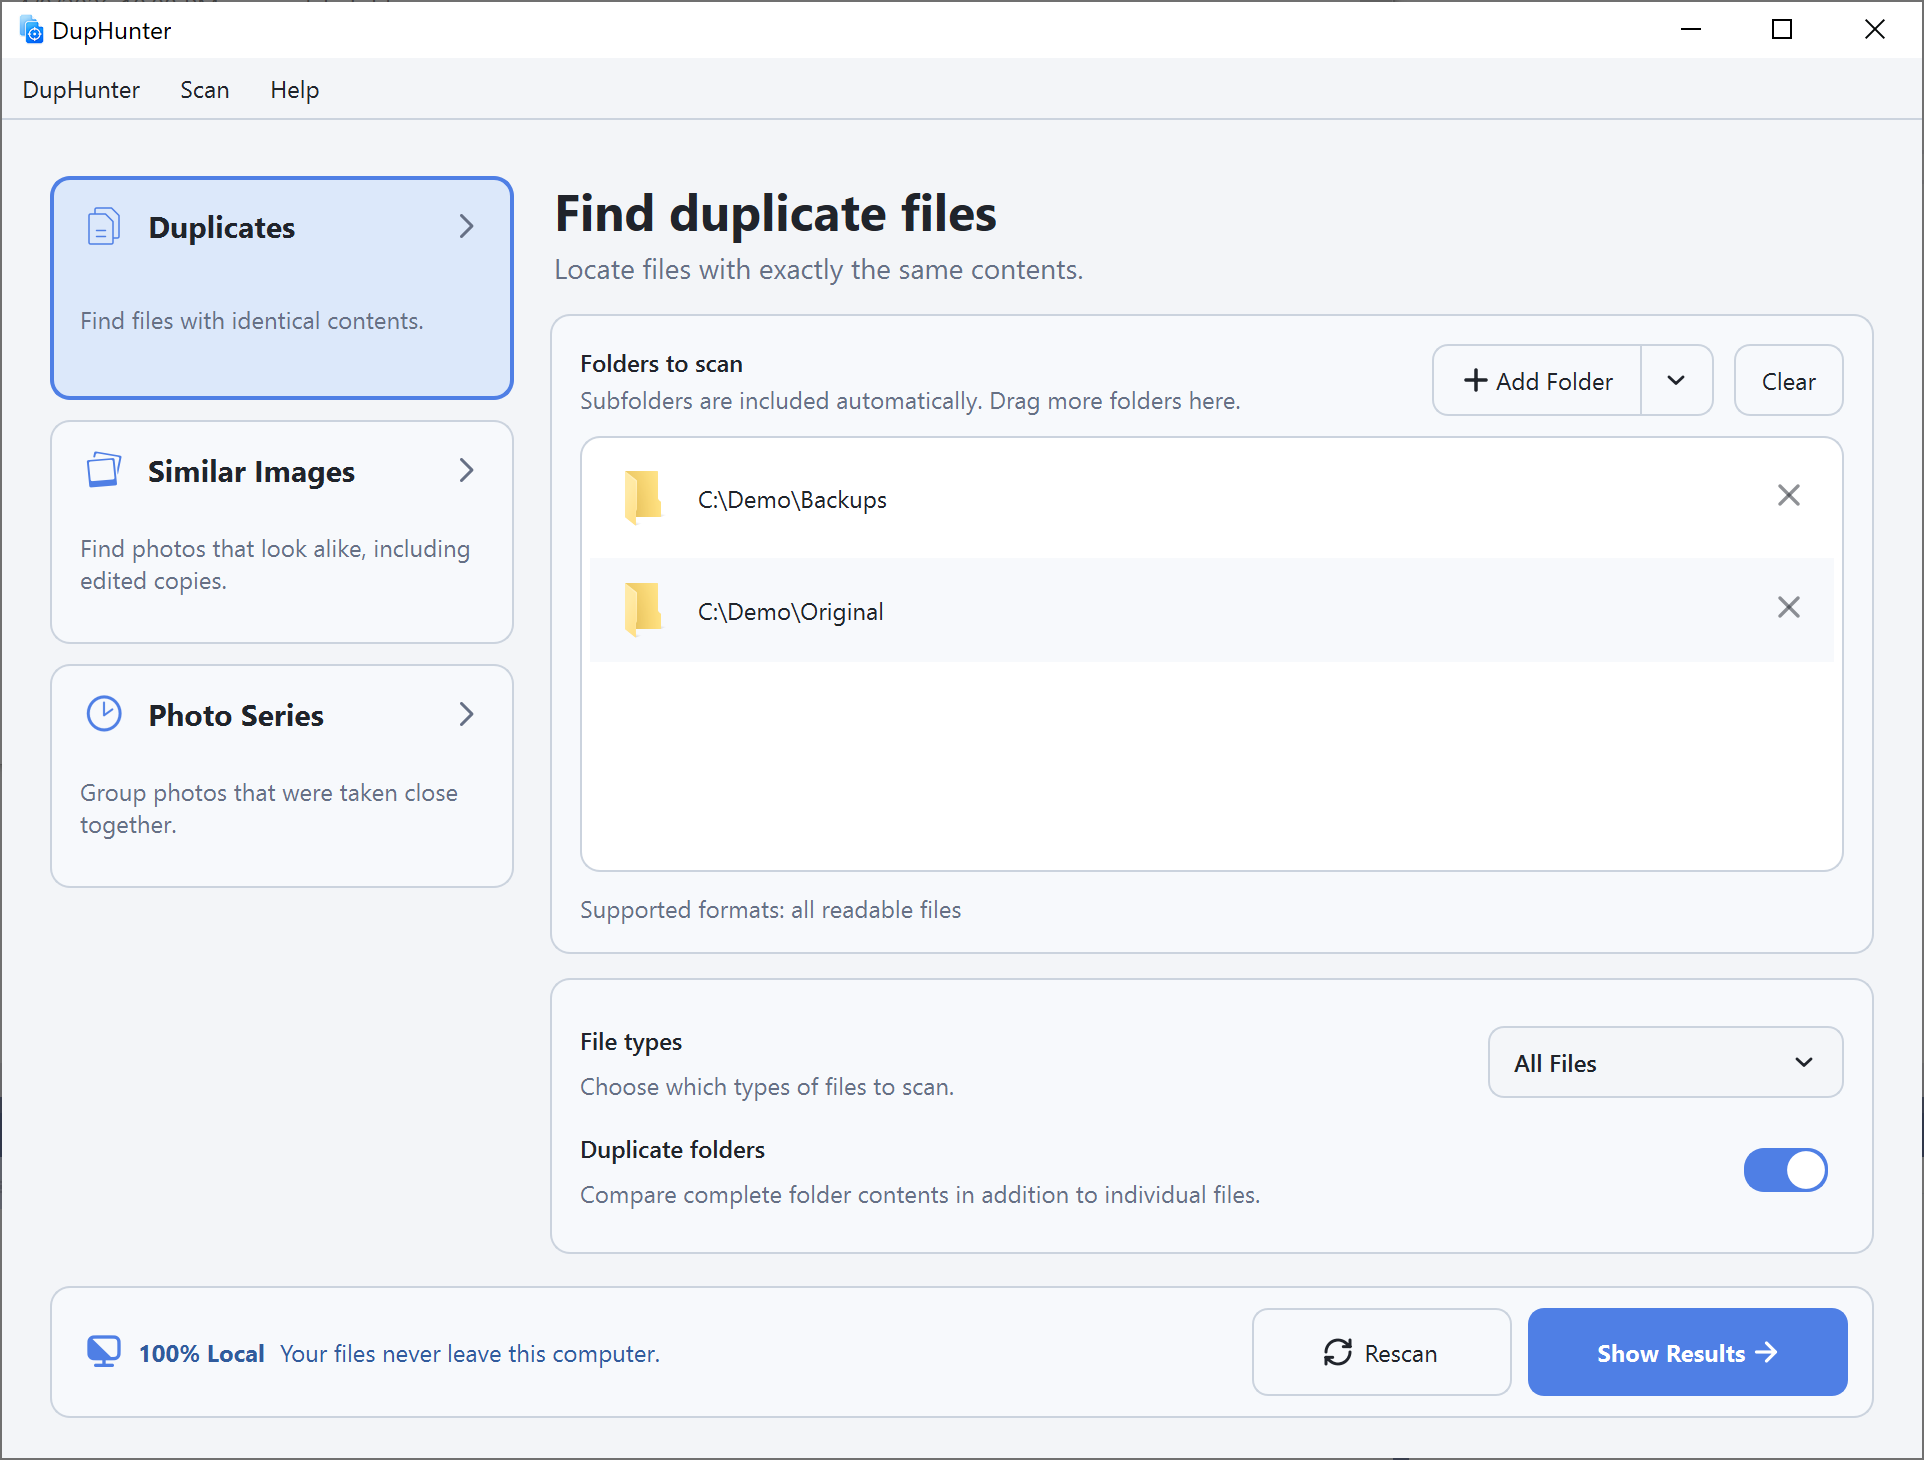
Select Duplicates in the left sidebar. Add one or more folders by clicking Add Folder, choosing a recent location, or dragging folders into the window. Subfolders are included automatically.
Step 2: Choose what to scan
Set File types to All Files, Images, Documents, Archives, Audio, Video, or Specific Extensions. Keep Duplicate folders enabled when you also want to compare complete folder contents; this option is available only with All Files.
Step 3: Review exact-copy groups
Click Find Duplicates. DupHunter scans locally and groups exact file copies. Select a result group to inspect its file type, size, path, and dates, then mark redundant copies in the item list.
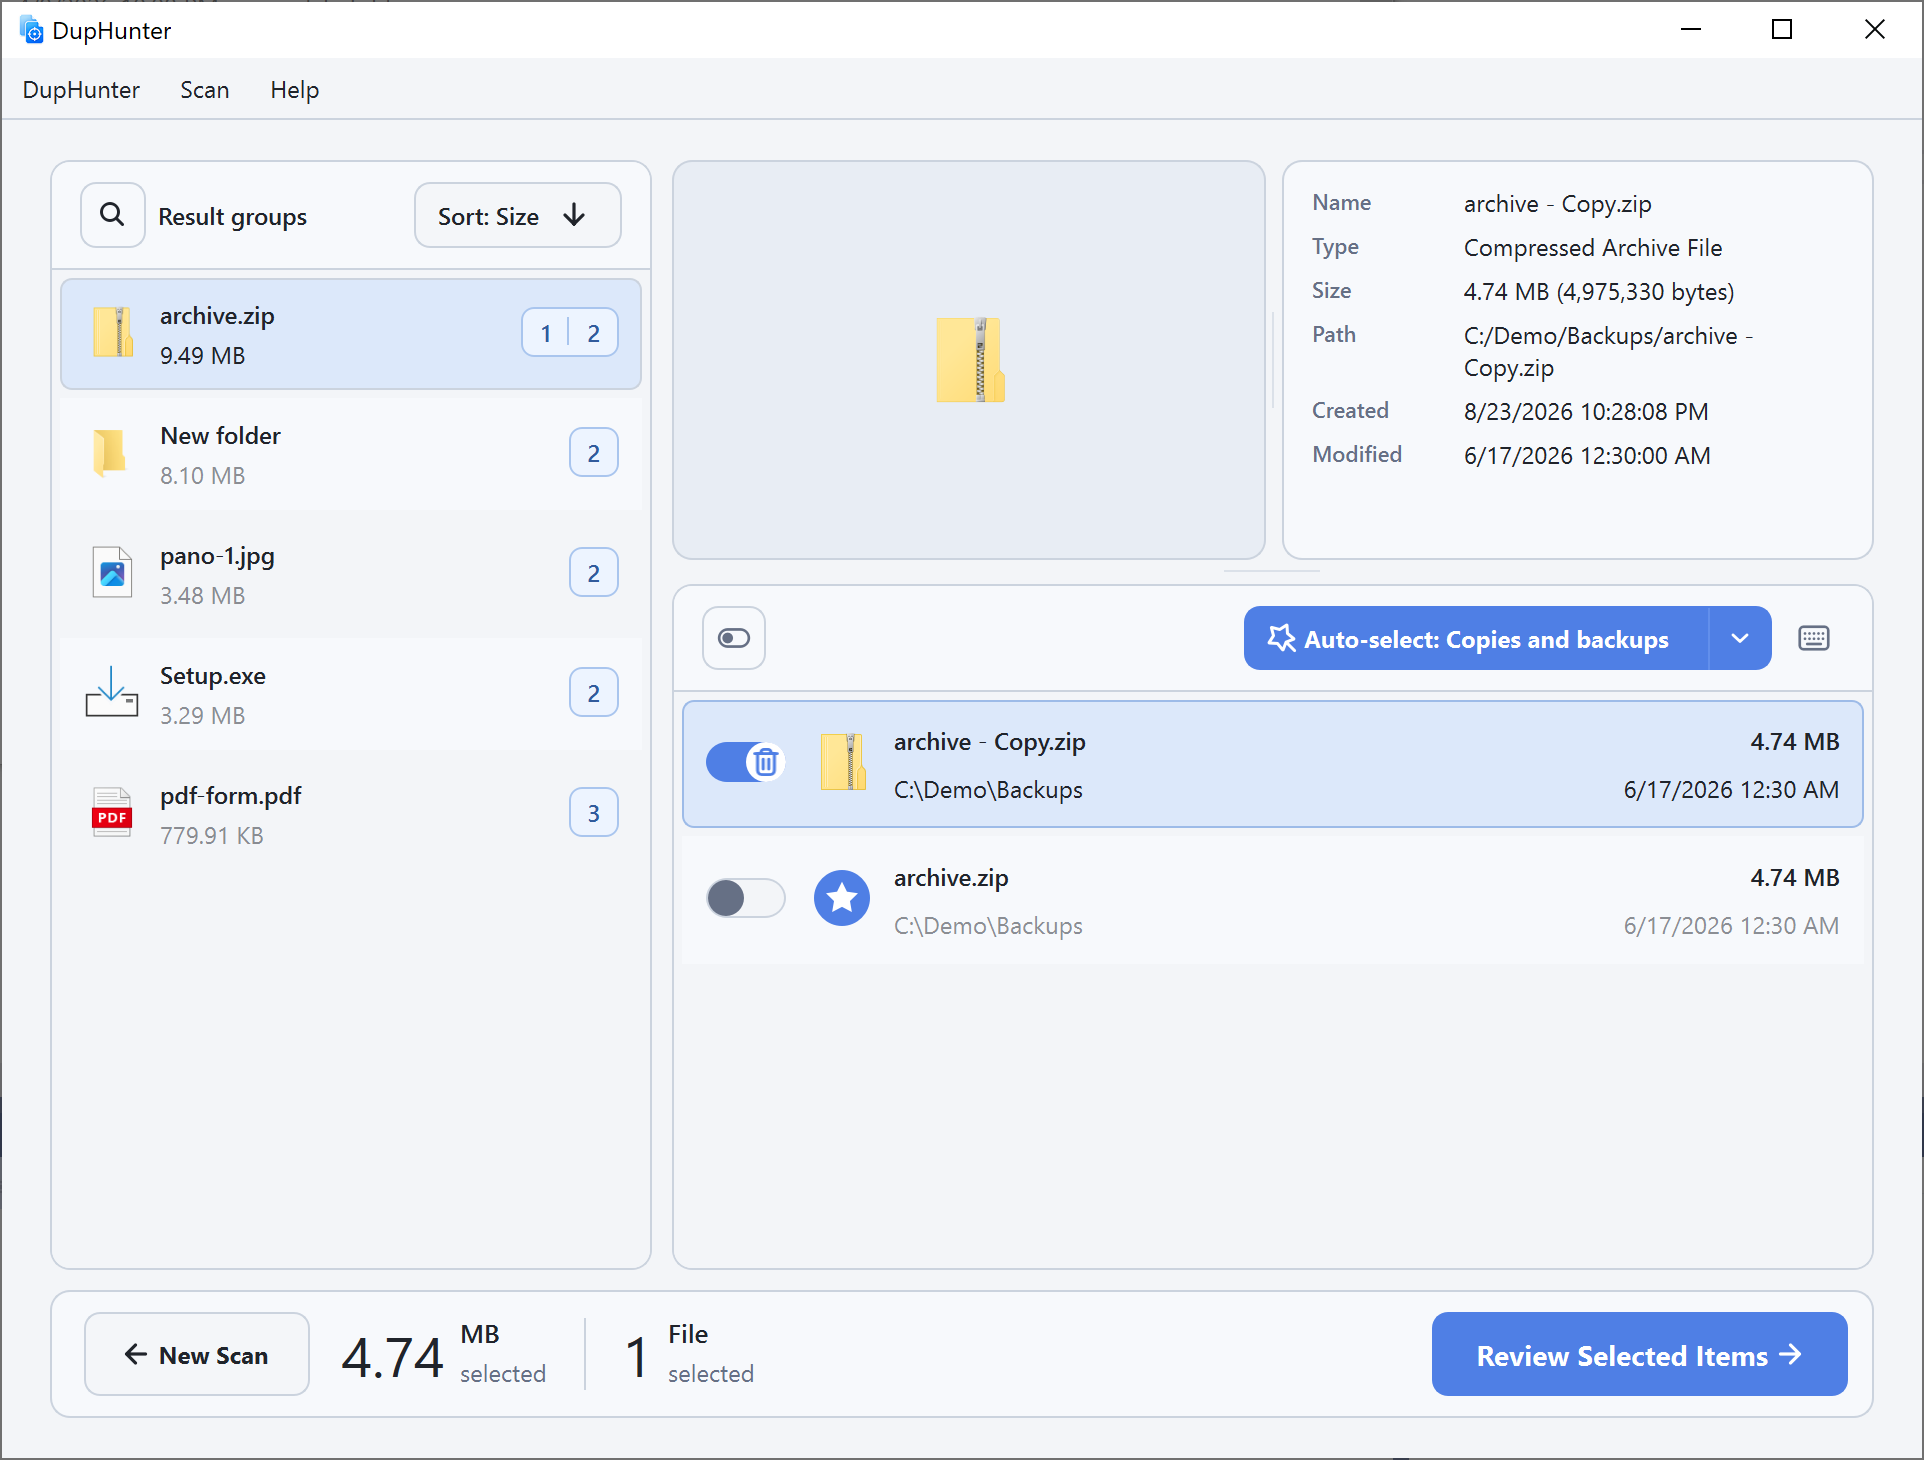
Folder groups are shown with folder icons. Their included file contents and relative structure match even if the root folder names or locations differ. See the dedicated duplicate folder guide for the additional verification step.
Sort groups by size, select an item to inspect its path and metadata, and use the lower list to mark copies for removal. Keyboard shortcuts let you move through results and toggle selections quickly.
Step 4: Apply a selection rule
Use the rule menu—for example, Copies and backups, Older files, or one of your own rules—to select likely duplicates automatically. Rules are additive and can be adjusted manually. Unless you explicitly change the removal safety preference, DupHunter keeps at least one item in every group.
Learn how to create automatic selection rules.
Step 5: Confirm the final removal list
Click Review Selected Items. Uncheck anything you want to keep, then choose Remove Selected Items. DupHunter sends confirmed items to the operating system's Trash or Recycle Bin.
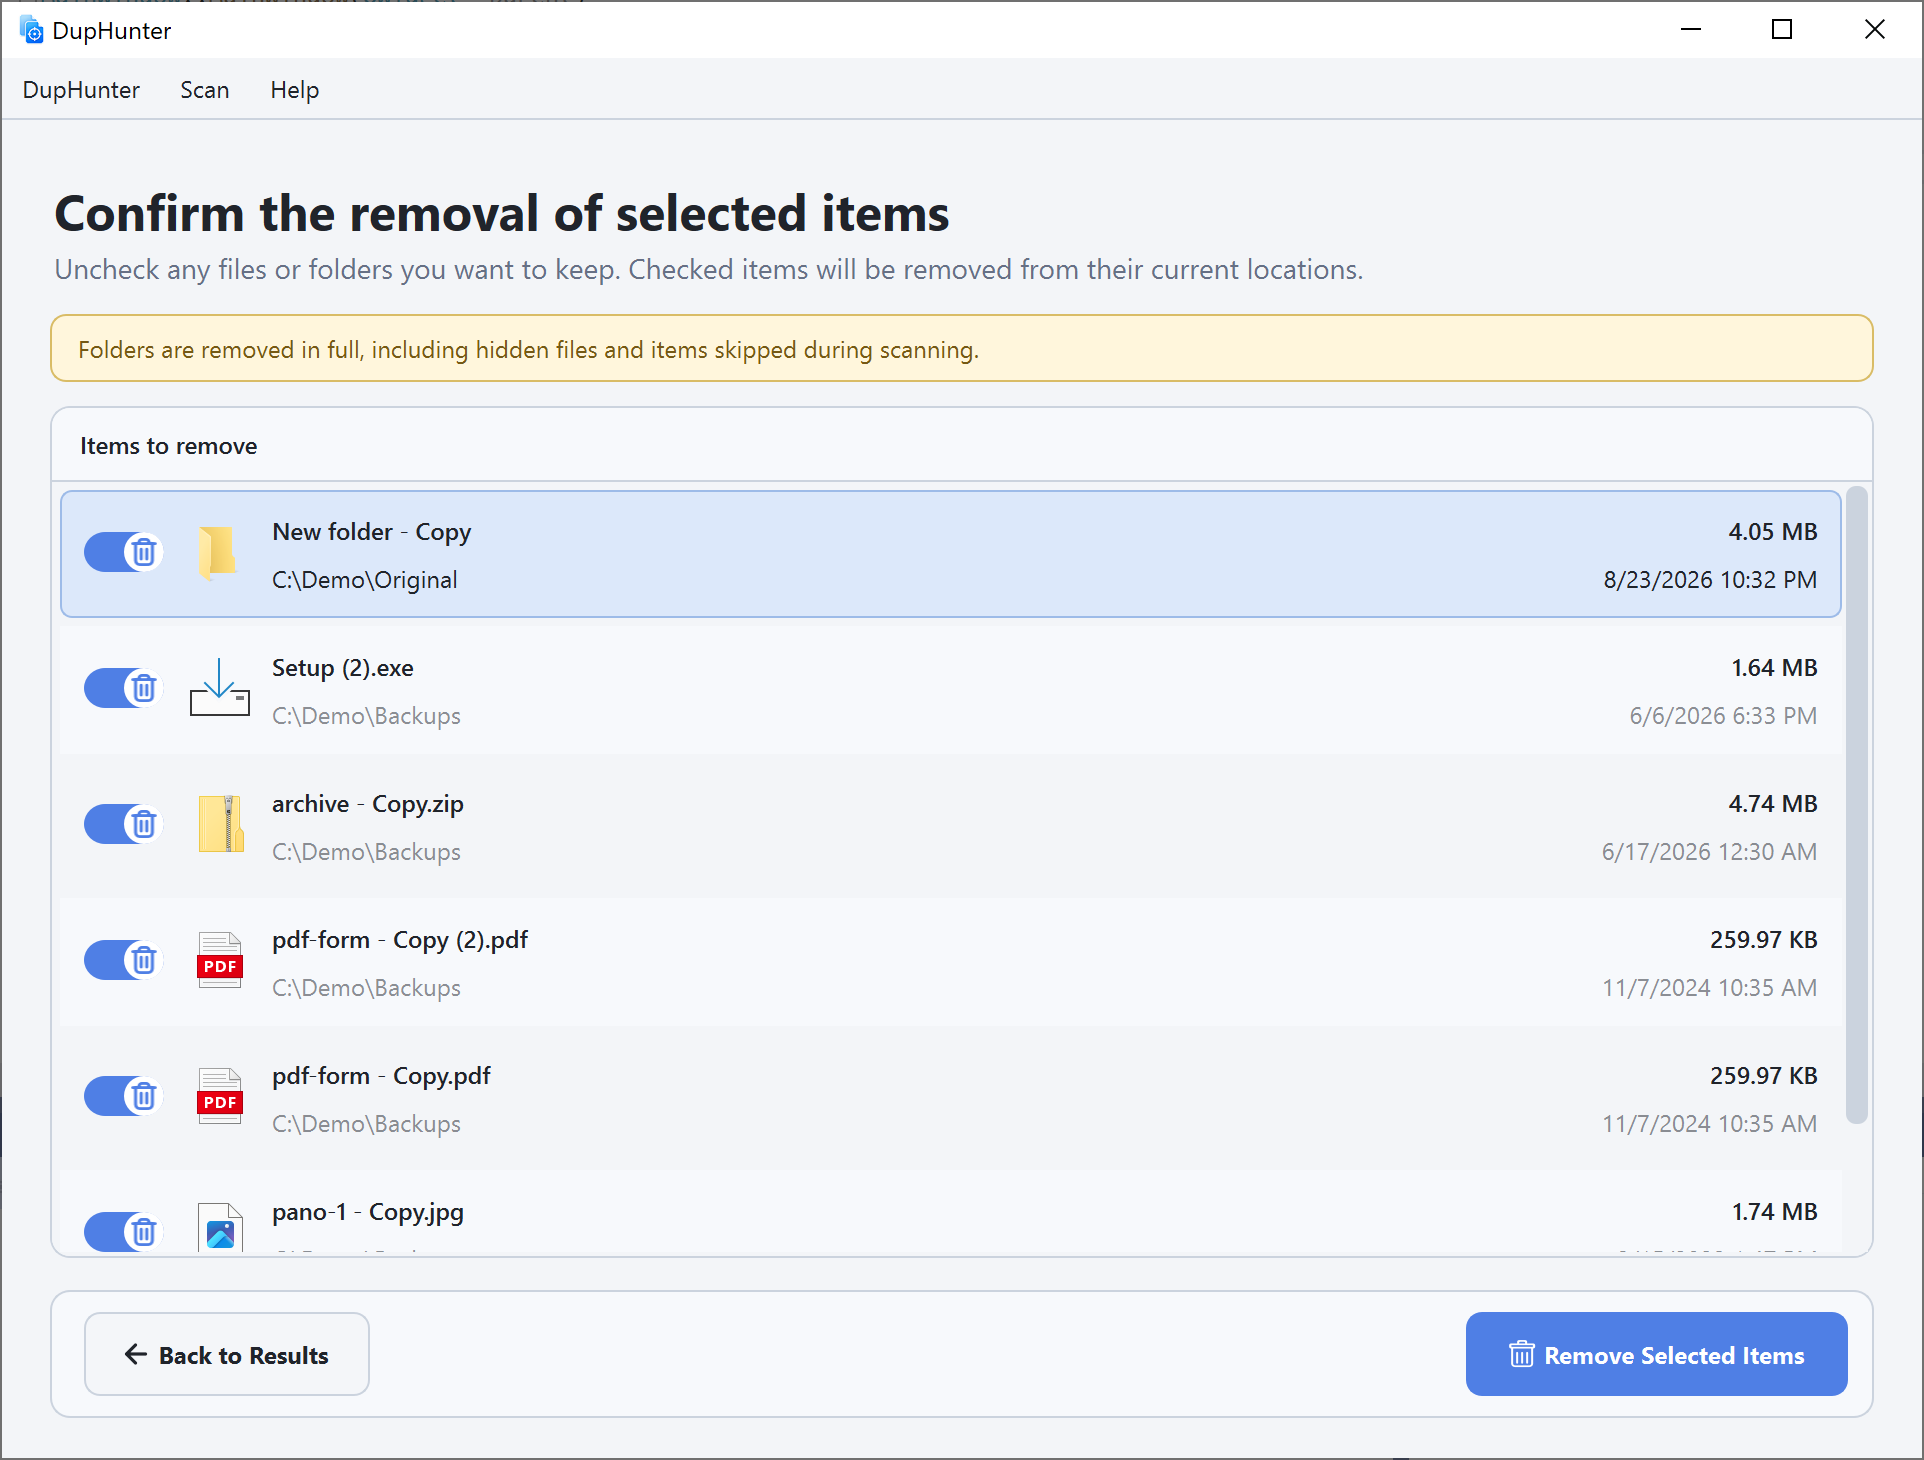
Before a duplicate folder is moved, DupHunter verifies that its included structure and contents still match the copy being kept. Relevant changes stop removal. Completed cleanups are recorded in Removal History, where available Trash items can be restored to their original locations.