Duplicate folders often appear after backups, migrations, and manual copies. DupHunter finds folders whose included files have the same contents and the same relative structure. The copies may have different root names and may live on different drives.
Step 1: Scan with Duplicates mode
Select Duplicates, add every location that may contain a copy, choose All Files, and keep the Duplicate folders switch enabled. Subfolders are included automatically. Use the Skip List before scanning if caches, build folders, or archives should not participate in the comparison.
Step 2: Open a folder result group
After the scan, folder groups appear alongside file groups. Select a group with folder icons. The group size shows the recoverable space represented by its matching folder copies, while the item list shows the location and date of each copy.
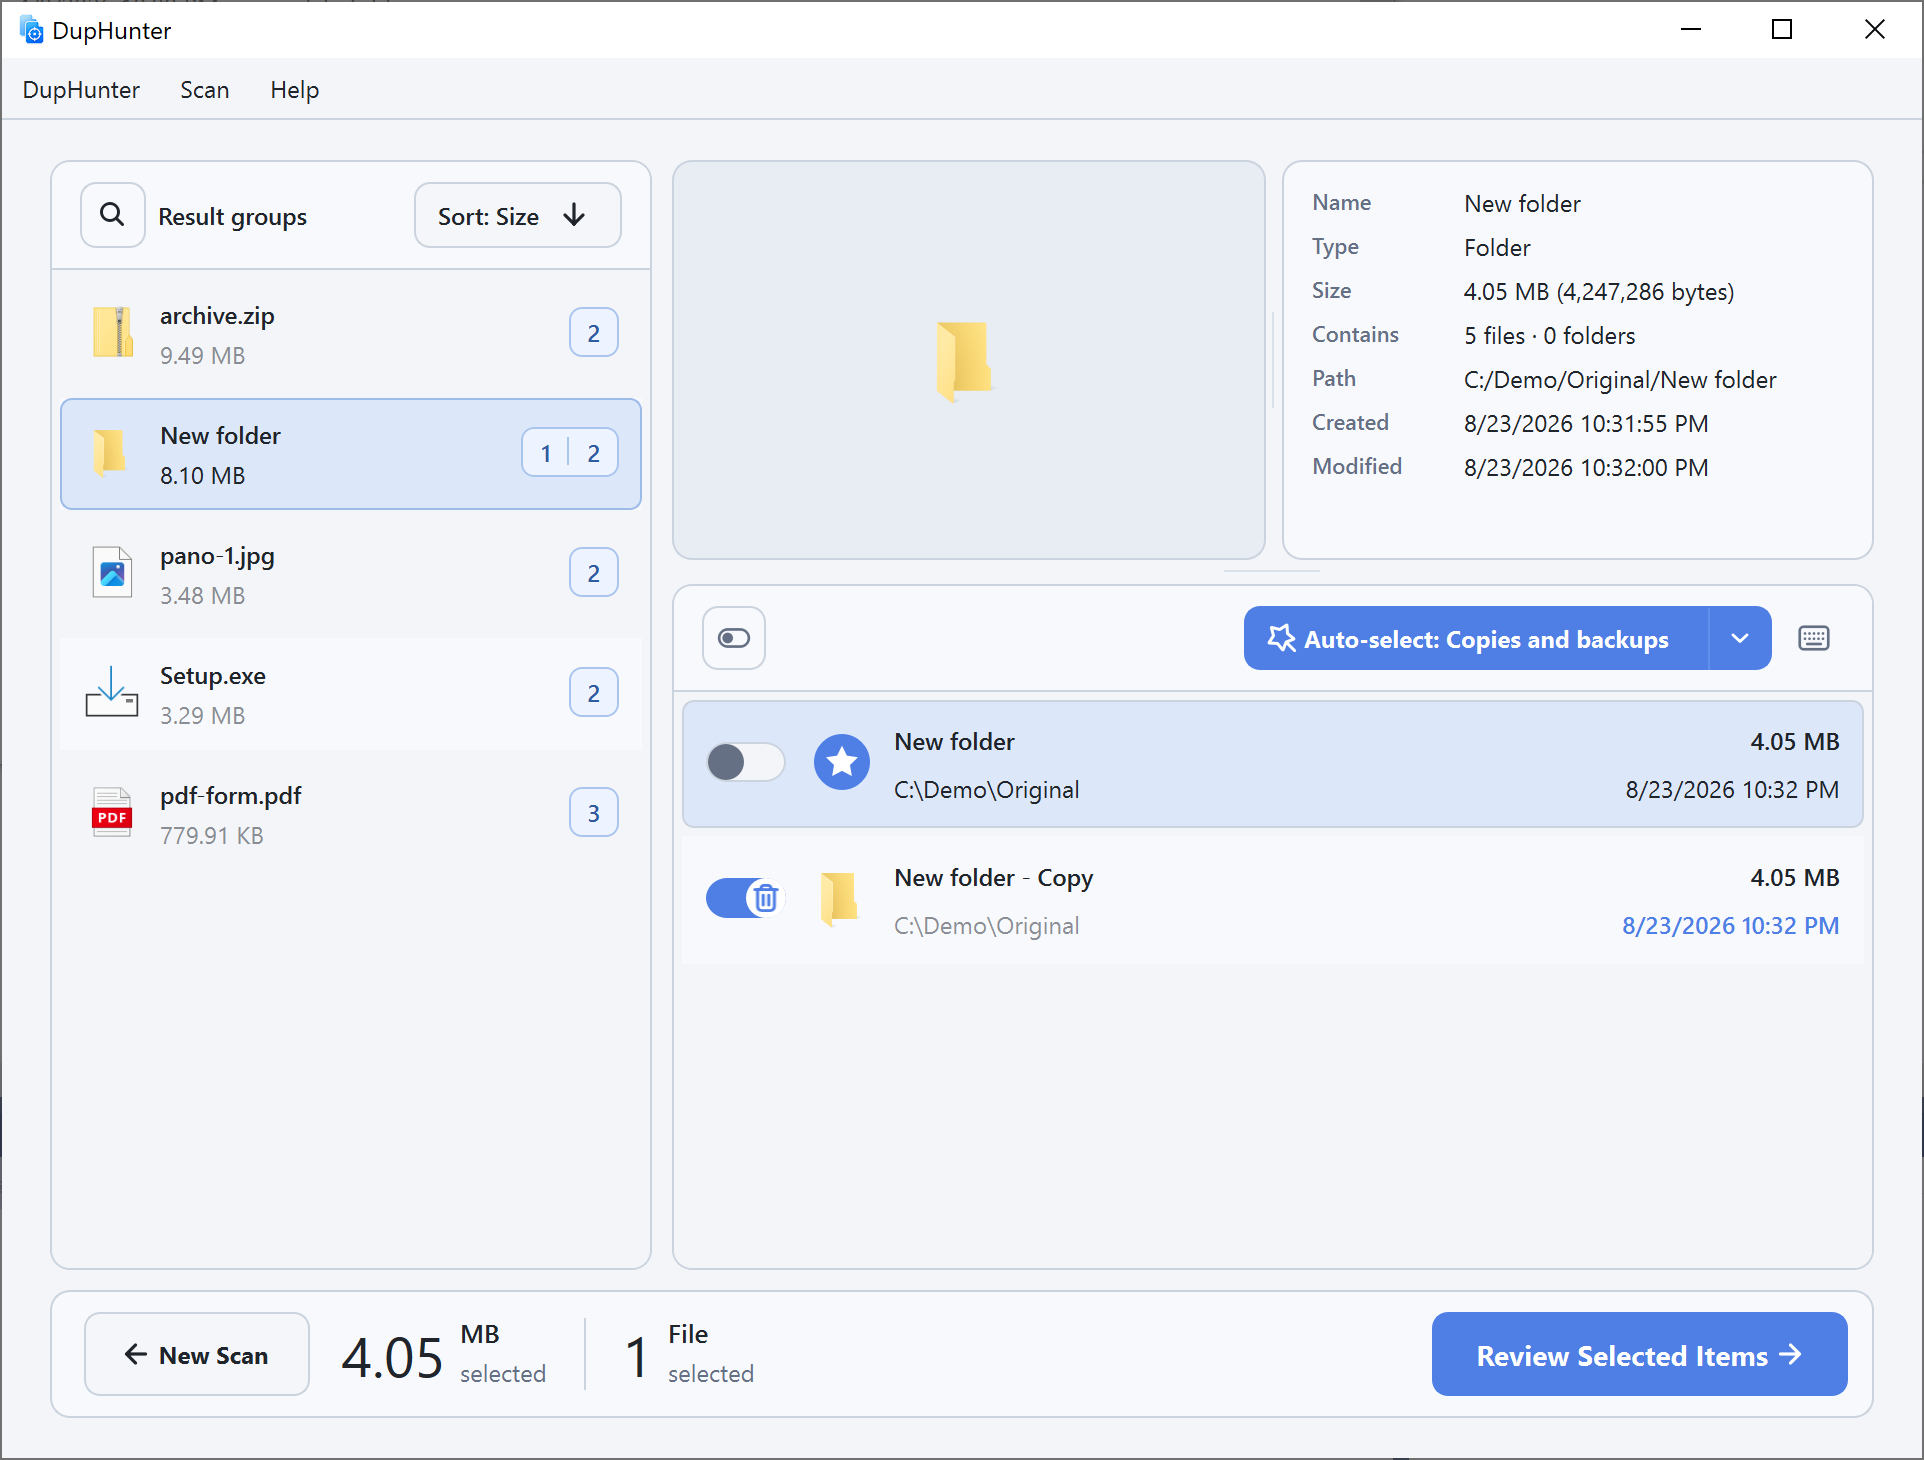
Step 3: Choose the folder to keep
Compare the paths and dates, then leave the preferred folder unselected. Select only the redundant copies. You can do this manually or apply an automatic selection rule created specifically for folders.
Step 4: Review the removal list
Click Review Selected Items. Confirm that the folder you want to keep is absent from the list and that every selected path is a redundant copy. Uncheck an item if anything looks uncertain.
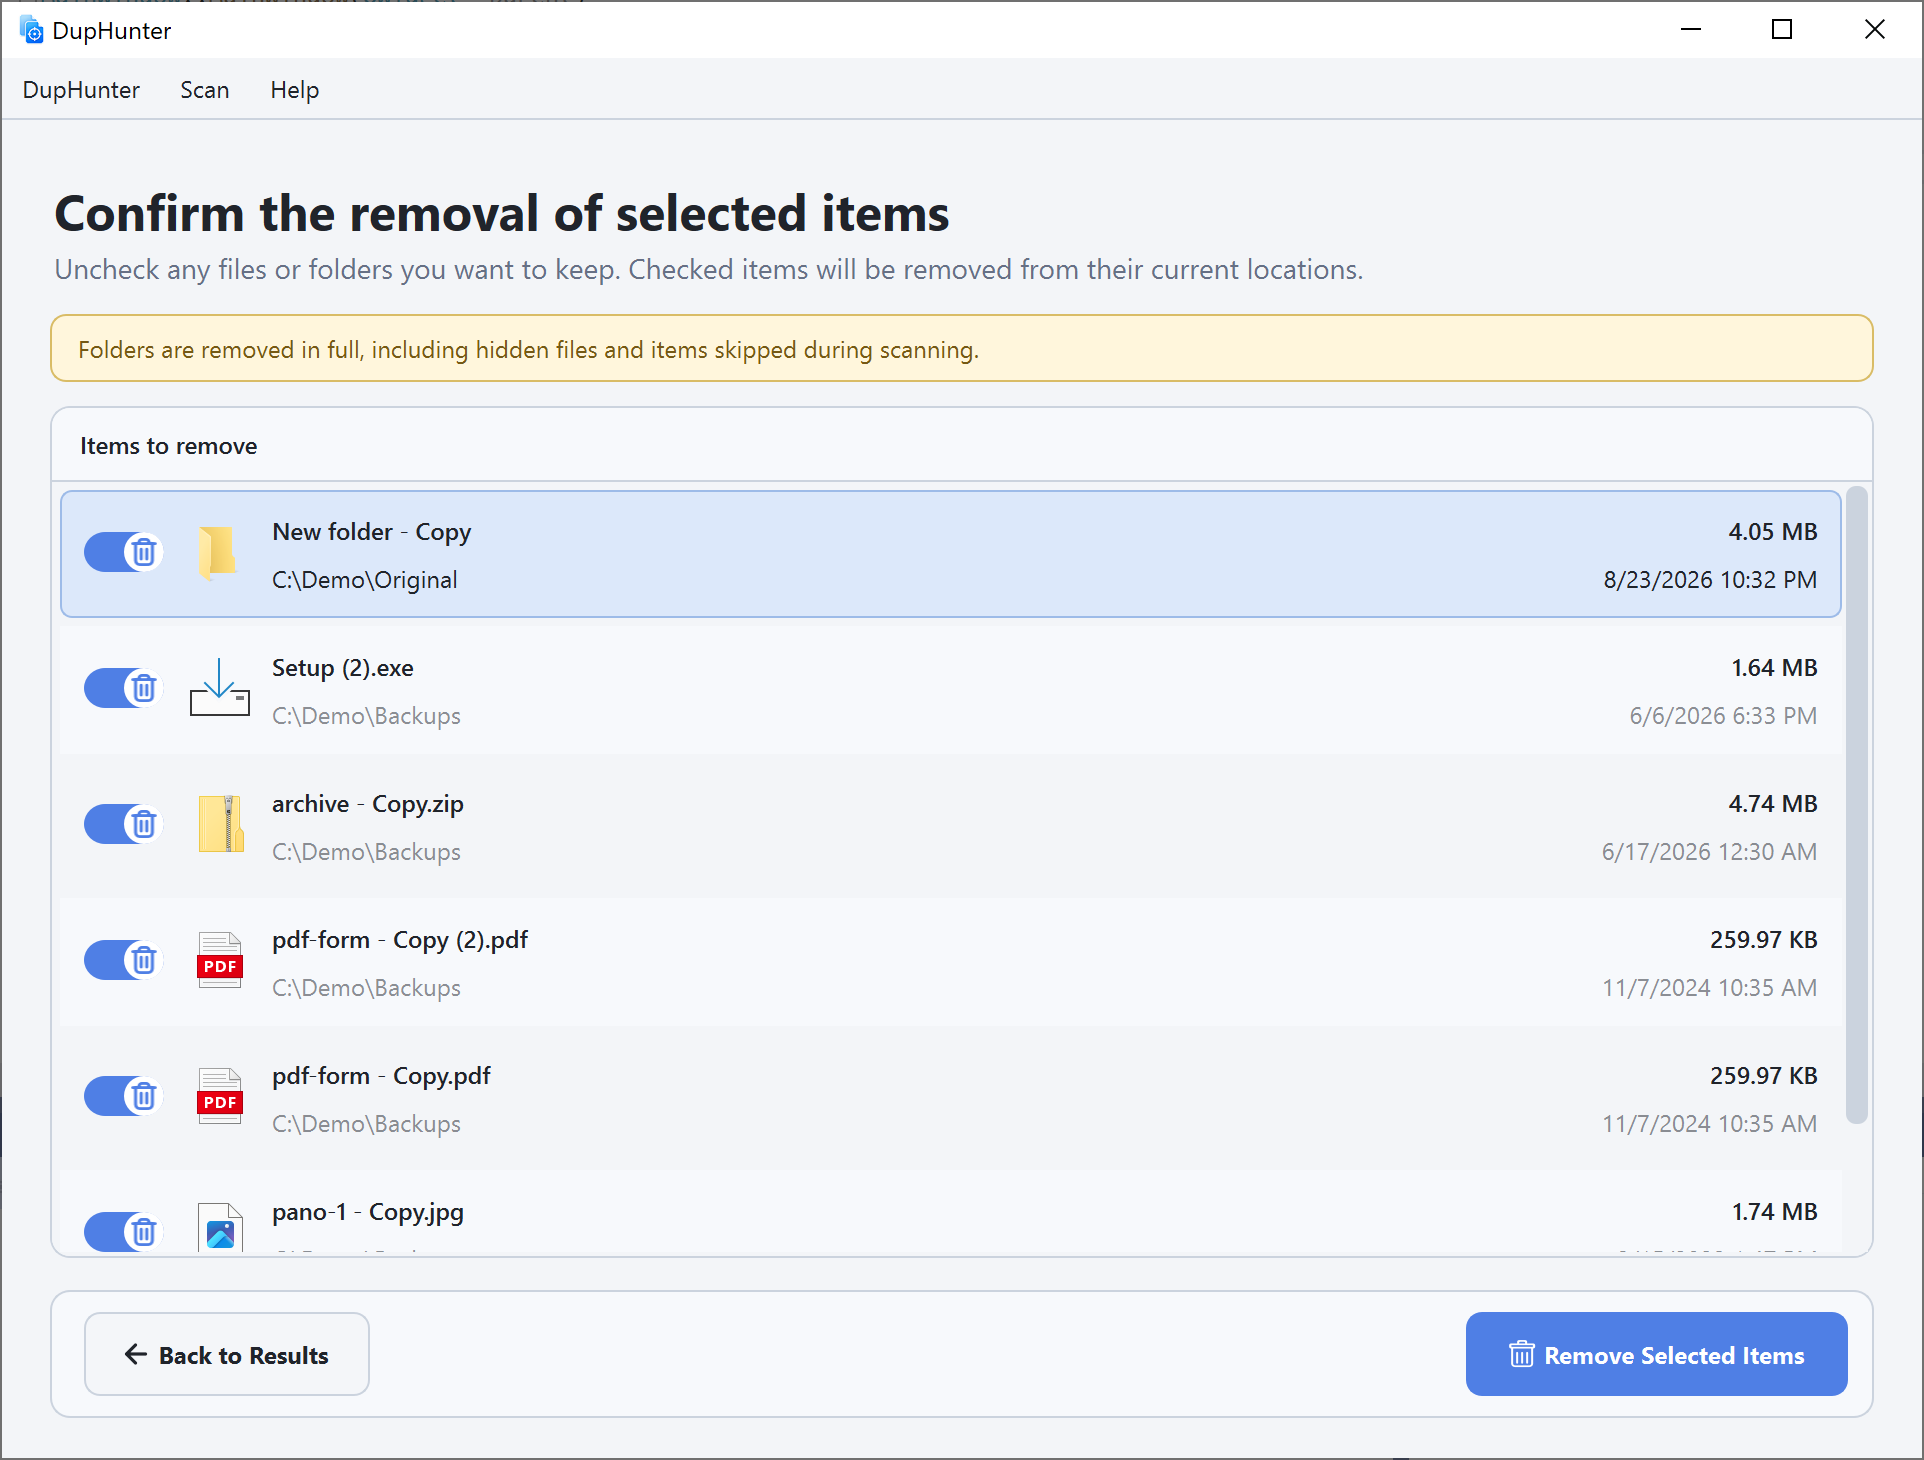
Step 5: Let DupHunter verify the folders again
When you choose Remove Selected Items, DupHunter rechecks every selected duplicate folder against the copy being kept using the original scan manifest. If relevant structure or file contents changed after the scan, removal stops instead of acting on stale results. Verified items are then sent to the operating system's Trash or Recycle Bin.
Completed operations appear in Removal History, where items still available in the Trash can be restored to their original locations.